Mostrando entradas con la etiqueta ART. Mostrar todas las entradas

martes, 18 de septiembre de 2012

Inked Witch


Supplies Needed:
Psp
Tube of choice. Art by Foto-Retro from ART, pruchase it here
Scrap kit (PTU) Dark Gothic by Niqui's Designs: here
Font here


Open a new image: 600x500

Open: nq-element 55. c/p in the canvas. Resize at 420x350 pixels (smart size)
Grab the magic wand, click inside the frame. Expand by 10 pixels

Open: nq-paper 6. c/p in the canvas.Resize at 300x250 pixels (smart size)
Duplicate the layer. 
Adjust - Add Noise:

Uniform
35 percent
Monochrome

In the layer palette change the blend mode to soft light. Merge down.
Open: nq-element 22, C/p in the canvas, Resize at 240x200 pixels (smart size)
Place it above the paper. Remove the excess outside the frame.

Open: nq-element 3. C/p in the canvas, Resize at 390x325 pixels (smart size).
Place it above the frame.

Open: nq-element 50. C/p in the canvas, Resize at 420x350 pixels (smart size).
Place it in the left side of the frame. Duplicate. Image - Mirror.

Open: nq-element 6. C/p in the canvas, Resize at 303x252 pixels (smart size).
Place it in the right bottom side of the frame.

Open: nq-element 14. C/p in the canvas, Resize at 235x196 pixels (smart size).
Place it at the bottom of the frame.

Open: nq-element 21. C/p in the canvas, Resize at 100x83 pixels (smart size).
Place it above the leaves.

Open: nq-element 17. C/p in the canvas, Resize at 100x83 pixels (smart size).
Place it above the leaves.

Open: nq-element 31. C/p in the canvas, Resize at 110x92 pixels (smart size).
Place it below the mail box. Duplicate and place it at the top behind the leaves.

Add more elements the tag:
nq-element 12
nq-element 26
nq-element 27
nq-element 52


Always: Resize, sharpen and place as desire. 
Add drop shadow:
V: 4 H: 4
O: 40 B: 6


Open the tube, c/p in the canvas. Resize and place it in the left side.
Add drop shadow:
V: -2 H: 5
O: 45 B: 8

Add copyright and your name. Merge Visible, copy and paste as new image. Export as a png or jpg.

lunes, 10 de septiembre de 2012

Scarlet Queen


Supplies Needed:
Psp
Tube of choice. Art by Joahannah von Frankenstein from ART, pruchase it here
Scrap kit (PTU) Gothic Obsession by Crystals Scraps Creations: here
Template 111  by Denz Designs here
Font here


Open the template. Duplicate and close the original.
Delete the layer: credits
Change the canvas size to: 600x600

Activate the layer: black back
Selections - All. Float - Defloat. Add a new layer.

Open paper: 3. Copy and paste into the selection. 
Delete the original template layer.

Activate the layer: white rectangle
Selections - All. Float - Defloat. Add a new layer.

Flood fill with a color from your tube, I've used the color: #a12036

Adjust - Add Noise:
Gaussian 
35 percent
Monochrome

Delete the original template layer.


Activate the layer: black rectangle weaved.
Selections - All. Float - Defloat. Add a new layer.

Open paper: 2. Copy and paste the part you like. 
Delete the original template layer.


Activate the layer: left small circle.
With the magic wand click inside.

Open paper: 10. Copy and paste into the selection. 
Do not delete the template layer.

Activate the layer: righ small circle.
With the magic wand click inside.

Open paper: 10. Copy and paste into the selection. 
Delete the original template layer.

Open the close up of the tube and paste into both of circles.
Change the blend mode of the left close up to: Luminance Legacy
Change the blend mode of the left close up to: Overlay

Open the tube, c/p in the canvas. Place in the left side of the template.
Add drop shadow:
V: 0 H: 3
O: 45 B: 7

Open: gothic e26. c/p in the canvas. Resize at: 165x165 pixel size. Smart Size.
Place it in the right top of the rectangle.

Open: gothic e2. c/p in the canvas. Resize at: 125x125 pixel size. Smart Size.
Place it at the bottom of the rectangle, in the left bottom corner.
Image - Free Rotate: Left 20 degrees. Duplicate. Image - Mirror. Place it below the crow.

Open: gothic e40. c/p in the canvas. Resize at: 220x220 pixel size. Smart Size.
Place it at the bottom of the rectangle, in the left side.

Open: gothic e27. c/p in the canvas. Resize at: 140x117 pixel size. Smart Size.
Place it next to e40.

Open: gothic e37. c/p in the canvas. Resize at: 115x115 pixel size. Smart Size.
Place it next to the skeleton cup.

Open: gothic e37. c/p in the canvas. Resize at: 220x183 pixel size. Smart Size.
Place it next to the rose.

Open: gothic e12. c/p in the canvas. Resize at: 75x75 pixel size. Smart Size.
Place it above the accent.


Open: gothic e18. c/p in the canvas. Resize at: 120x120 pixel size. Smart Size.
Place it at the bottom of the cup.

Always sharpen the elements before apply the shadow.
Add drop shadow:
V: 0 H: 2
O: 45 B: 5

Add copyright and your name. Merge Visible, copy and paste as new image. Export as a png or jpg.

viernes, 31 de agosto de 2012

Dark Mood


Supplies Needed:
Psp
Tube of choice. Art by Gabi Spree from ART, pruchase it here
Scrap kit (PTU) Dark Mood by Scrapper's Gone Bad: here
Font here


Open a new image: 630x500

Open: the tube, c/p in the canvas, place it in the center. Resize.
Add drop shadow:
V: 2 H: 2
O: 80 B: 8
Open: sdjpc-dark-mood-kit-17. c/p in the canvas. Resize at: 65 percent - Smart Size.

Image - Free Rotate:
Right 
80 degrees

Place it behind the tube, in the left side. Duplicate. Image - Mirror.
Move it behind the tube and next to the other frame. Merge down this layers.

Take the magic wand and click in 3 frames of your choice:

Selections - Modify - Expand: 5 pixels.

Open paper: sdjpc-dark-mood-kit-P5. c/p in the canvas. Resize at: 70 percent - Smart Size.
Selections - Invert. Edit - Clear. Deselect.

Select the empty frames. Selections - Modify - Expand: 5 pixels.

Open paper: sdjpc-dark-mood-kit-P7. c/p in the canvas. Resize at: 50 percent - Smart Size.
Selections - Invert. Edit - Clear. Deselect.

**Optional: Add the closeup of the tubes inside of the frames you want:


Open: sdjpc-dark-mood-kit-7. c/p in the canvas. Resize at: 67 percent - Smart Size.
Send the layer to the bottom. Place it in the center.

Open: sdjpc-dark-mood-kit-79. c/p in the canvas. Resize at: 50 percent - Smart Size.
Place it in the right side, send the layer below the wordart.

Open: sdjpc-dark-mood-kit-80. c/p in the canvas. Resize at: 40 percent - Smart Size.
Image - Flip. Image - Free Rotate:
Right 
10 degrees

Open: sdjpc-dark-mood-kit-87. c/p in the canvas. Resize at: 40 percent - Smart Size.

Place it in the right side border of the frame. Duplicate. Image - Mirror.
Arrange it, merge down. move this layer above the frame.


Open: sdjpc-dark-mood-kit-84. c/p in the canvas. Resize at: 35 percent - Smart Size.
Place it in the right side, arrange the layer below the tube, at the bottom of the frames.
Duplicate. Image - Mirror.

Open: sdjpc-dark-mood-kit-85. c/p in the canvas. Resize at: 30 percent - Smart Size.
Place it in the right side, above the first leaves. Duplicate. Image - Mirror.

Open: sdjpc-dark-mood-kit-36. c/p in the canvas. Colorize to black and white.
Resize at: 25 percent - Smart Size. Place it in the left bottom frame. 
Duplicate and move it next to the leaves, in the right side of the canvas.

Open: sdjpc-dark-mood-kit-48. c/p in the canvas. Resize at: 25 percent - Smart Size.
Image - Mirror. Place it behind the tube, in the right side of the frames.


Add more elements the tag:
sdjpc-dark-mood-kit-34
sdjpc-dark-mood-kit-38
sdjpc-dark-mood-kit-39
sdjpc-dark-mood-kit-42
sdjpc-dark-mood-kit-49
sdjpc-dark-mood-kit-50
sdjpc-dark-mood-kit-66
sdjpc-dark-mood-kit-90
sdjpc-dark-mood-kit-91

Always: Resize, sharpen and place as desire. 
Add drop shadow:
V: -1 H: 1
O: 45 B: 4

Add copyright and your name. Merge Visible, copy and paste as new image. Export as a png or jpg.

viernes, 24 de agosto de 2012

Rocker


Supplies Needed:
Psp
Tube of choice. Art by Kittrose from ART, pruchase it here
Scrap kit (PTU) Rock City by Abstract Creations: here
Font here

Open a new image: 650x500

Open: e58. c/p in the canvas, with the selection tool:

Make a selection around the canvas, to remove the excess.
Duplicate. Resize at 90 percent. Duplicate again, resize at 90 percent.

Open: e43. c/p in the canvas, resize at 80 percent - Smart size.
With the magic wand click inside of the frame. 
Selections - Modify - Expand by: 5 pixels.

Open: p5. c/p in the canvas, selections - invert. Edit - Clear.
Move the layer below the frame. Do not deselect yet.

Open the tube, c/p in the canvas, resize if it's needed. 
Place it in the center of the frame. Selections - invert. Edit - Clear.

Activate the frame layer, duplicate and resize at 95 percent.

Open: e3. c/p in the canvas, resize at 80 percent - Smart size.
Place it at the bottom of the frame.

Open: e56. c/p in the canvas, resize at 30 percent - Smart size.
Place it in the left bottom side, duplicate. Image - Mirror.

Open: e5. c/p in the canvas, resize at 50 percent - Smart size.
Place it at the top of the frame.

Add more elements the tag:
e1
e12
e22
e23
e25
e26
e40
e42
e47
e48
e53

Always: Resize, sharpen and place as desire. 
Add drop shadow:
V: -2 H: 3
O: 55 B: 4

Add copyright and your name. Merge Visible, copy and paste as new image. Export as a png or jpg.

martes, 21 de agosto de 2012

Gothic Emily


Supplies Needed:
Psp
Tube of choice. Art by Lidia Misfit from ART, pruchase it here
Scrap kit (PTU) Gothic Poison by Crystal Creations: here
Mask 174 by Gemsmask here
Xero Radiance here
Font here


Open a new image: 650x450

Open: gp_ee10.C/p in the canvas, resize at 80 percent (smart size).
Place it in the center.

With the magic wand, click inside. Expand by: 5 pixels.

Open: gp_pp9. C/p in the canvas, resize at 70 percent (smart size).
Move the layer below the frame. Do not deselect.

Open the tube, c/p in the canvas, place it inside the frame.
Select. Duplicate the layer. 
Adjust - Blur - Blur More:

In the layer palette, change the blend mode to: Overlay.
Merge down the layers. Selections - Invert.  Edit - Clear.
Deselect.

Open: gp_pp7. C/p in the canvas. Send this layer to the bottom.
Effects - Plugins - Xero - Radiance:

Duplicate the layer. 
Effects - Texture effects - Fur:

In the layer palette, change the blend mode to: Multiply.
Merge down this layers.

Layers - Load mask: gemsmasks-174
Merge group. 

Open: gp_ee14. C/p in the canvas, resize at 85 percent (smart size).
Place it above the mask and behind the frame like this:

Open: gp_ee14. C/p in the canvas, resize at 70 percent (smart size).
Image - Flip. Place it in the left bottom corner. Duplicate.
Image - Mirror. Image - Flip.

Add more elements the tag:
gp_ee6
gp_ee11
gp_ee13
gp_ee17
gp_ee18
gp_ee19
gp_ee26
gp_ee27
gp_ee34


Always: Resize, sharpen and place as desire. 
Add drop shadow:
V: -1 H: 3
O: 50 B: 5

Add copyright and your name. Change the frame if you want.

lunes, 23 de julio de 2012

Funky Swirls


Supplies Needed:
Psp
Tube of choice. Art by Check 75, pruchase it here
Scrap kit (PTU) Emo Funk by Ditzy Designs: here
Font here


Open a new image: 600x500.

Open: Swirl 4. c/p in the canvas, resize 50 percent (smart size).
Place it at the right side. 

Open: Swirl 3. c/p in the canvas, resize 50 percent (smart size).
Image - Mirror. Place it in the left side.
Merge down.

Open: Swirl 2. c/p in the canvas, resize 40 percent (smart size).
Place it next to the big swirl.

Open: Swirl 1. c/p in the canvas, resize 40 percent (smart size).
Image - Mirror. Place it next to the big swirl.
Merge down this layers:

*Optional: with the freehand selection tool:

 remove small parts of the swirls:

To this:

Open: skull wings 2. c/p in the canvas, resize 40 percent (smart size).
Place it in the center, to cover the wings union.

Open: sad teddy 3. c/p in the canvas, resize 60 percent (smart size). twice.
Place it in the right side of the canvas.

Open: roses, c/p in the canvas, resize 40 percent (smart size).
Place it in the right side, behind the teddy layer.

Open the tube or closeup, c/p in the canvas, resize if needed.
Send to the bottom.
Add drop shadow:
V: -1 H: 3
O: 40 B: 6

Add more elements to decorate the tag:
Devilish Heart 2
Ribbon 1
Sparkle Hearts 1
Sparkle Hearts 3

Always: Resize, sharpen and place as desire. 
Add drop shadow:
V: 2 H: 3
O: 15 B: 5

Add copyright and your name. Merge Visible, copy and paste as new image. Export as a png or jpg.

viernes, 13 de julio de 2012

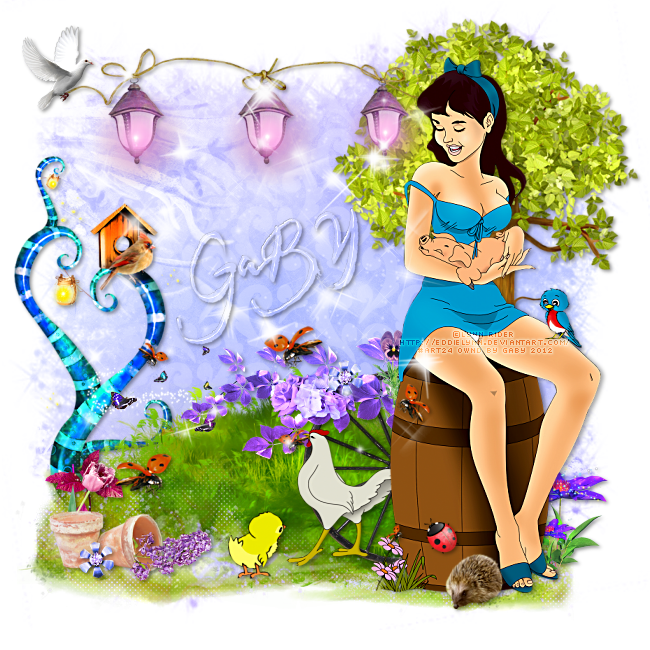
Farmer's daughter


Supplies Needed:
Psp
Tube of choice. I have used a tube by Lynn Rider, you can find the tube: here
Scrap kit (PTU) Illusions by Abstract Creations: here
Eyecandy 4000
Font here

Open a new image: 650x650.
Open paper: p3. c/p in the canvas. 
Apply the mask: gemsmask16. Merge group. Duplicate and merge down.

Open: e79. c/p in the canvas, resize 80 percent (smart size).
place it in the right side.
Open: e22. c/p in the canvas, place it at the bottom of the image.
Open: e20. c/p in the canvas, place it in front of the grass. 
Open: e86. c/p in the canvas, resize 80 percent (smart size). 
place it at the top next to the tree. 

Open: e9. c/p in the canvas, resize 70 percent (smart size). 
place it in the right side of the tag, behind the grass. 

Open the tube. c/p in the canvas, resize if needed. Place it in the right side of the tag.
Add drop shadow:
V: 1 H: 3
O: 35 B: 6

The tube comes with extra animals,I added some of  them in the tag :)
Add more elements the tag:
e21
e37
e42
e53
e64
e65
e66
e68
e73
e78
e84
e95
e97
e100

Always: Resize, sharpen and place as desire. 
Add drop shadow:
V: 2 H: 2
O: 40 B: 5

Add copyright and your name. Merge Visible, copy and paste as new image. Export as a png or jpg.

sábado, 7 de julio de 2012

Zombie Love


Supplies Needed:
Psp
Tube of choice. I have used a tube by Lidia Misfit, you can find the tube: here
Scrap kit (PTU) Zombie Heart by Tragic Scraps: here
Eyecandy 4000
Font here

Open a new image: 650x650.
Open: Frame 5. c/p in the canvas, resize at 80 percent (smart size)
Image - Mirror.
With the freehand selection, make a selection around the frame.
Like this:

Open: paper22. c/p in the canvas.
Effects - Plugins - Eyecandy 4000 - Marble:
Selections - invert.
Remove the excess of the paper. Invert the selection, again.
Open: Blood Curtain. c/p in the canvas, place it in the top of the frame.
selections - Invert. Edit - Clear. Deselect. (don't apply shadow)

Open the tube, c/p in the canvas, resize if needed. Place it in the right side of the frame.
Duplicate, apply gaussian blur: radius by: 3 pixels.
In the layer palette, change the blend mode to: Overlay. Low the opacity to: 80.
Select the original tube layer. 
Add drop shadow:
V: -2 H: -7
O: 70 B: 6

Select the frame layer.
Open: Word Art 2. c/p in the canvas, resize at 70 percent (smart size).
Place it to the top right of the frame. Duplicate the layer.
In the layer palette, change the blend mode to: Soft Light.

Open: lillies. c/p in the canvas.
Image - Free rotate:
Left - 60 degrees

Place it at the bottom of the frame.
Open: black roses. resize at 70 percent (smart size). 
Place it above but a lil far from the lillies.

Add more elements the tag:
Book, Candle, & Rose
Gem 3
Goblet
Hourglass

Always: Resize, sharpen and place as desire. 
Add drop shadow:
V: -1 H: 2
O: 50 B: 5
Add copyright and your name. Merge Visible, copy and paste as new image. Export as a png or jpg.

To animate:
Add a layer, flood fill with white, send the layer to the bottom.
Activate the layer: blood curtain.
Effects - Distortion Effects - Wave

Apply shadow:
V: -1 H: 2
O: 50 B: 5

Copy Merged. Open Animation Shop. Paste as a new animation. 
back to psp. Edit - undo. Apply the wave effect again, but change:
Amplitude to 2 
from the vertical displacement.
Add shadow.
Copy merged, paste after current frame.  
Repeat one more time, but change:
Amplitude to 1
from the vertical displacement.
Copy merged, paste after current frame. 
Select the second frame, copy, activate the last frame, paste after current frame.
Copy the first frame, copy, activate the last frame, paste after current frame.
Change the speed if you want. Save and you're done. (=

martes, 26 de junio de 2012

Join me


Supplies Needed: 
Psp
Animation Shop
Tube of choice. I am using a tube by Redfill. Available here
Scrap kit Join Me (PTU) by Manipulated by Magik. Purchase it: here
Eyecandy 4000
Font here


Open a new image: 650x650.
Open: frame 3. c/p in the canvas. 
Open: frame 2. c/p in the canvas, arrange it above the first frame:

With the selection tool make a small selection around the top:

Edit -  Clear. Deselect. Merge visible. Resize at 95 percent (smart size)

Click inside of the frame. Selections - Modify -  Expand by: 5.
Open: paper7. c/p in the canvas. Resize at 70 percent (smart size). 
Select the part you like. Remove the excess. Move the layer below the frame.
Click inside of the edges, expand by 5.

Open: paper5. c/p in the canvas. Send the layer behind the frame and remove the excess.

Click again inside of the center frame. Expand by: 5. 
Open the closeup of the tube, c/p in the canvas, place it behind the frame. Remove the excess.
Deselect. In the layer palette, change the blend mode to: Screen and low the opacity to: 70.
Open: word art 1. c/p in the canvas, place it in the center.
Effects - Plugins - Eyecandy 4000 - Gradient Glow:


Apply twice. Add drop shadow:
V: 0 H: 2
O: 45 B: 5

Open the tube: c/p in the canvas, resize if needed. 
Add drop shadow:
V: -2 H: 4
O: 60 B: 7
Apply shadow to the frame:
V: 3 H: 3
O: 55 B: 5

Add more elements to decorate the tag:
black flower
bottle
bottle cap2
bottles
butterfly 2
candle sconce
rose 1
sparkles1
spider
top hat
vine

Always: Resize, sharpen and place as desire. 
Add drop shadow:
V: 1 H: 2
O: 40 B: 3

Add copyright and your name. Merge Visible, copy and paste as new image. Export as a png or jpg.

lunes, 25 de junio de 2012

Patriotic Babe

Supplies Needed: 
Psp
Animation Shop
Tube of choice. I am using a tube by Ange 10 only at ART. Purchase it: here
Scrap kit Celebrate Freedom (PTU) by Creationz by WitchysHeart. Purchase it: here
Mask 107 by Gems here
Xenofex 2
Font here


Open a new image: 650x650.

Open: WH-Fence#2. c/p in the canvas, resize 50 percent (smart size).
Duplicate. Image - Mirror. Move the layer below:
With the selection tool, make a selection around the excess:

Delete:

Merge the layers.

Open: WH-Glitter Mask#1. c/p in the canvas, resize 75 percent (smart size).

Add a new layer. Selections - All.
Open the paper: WH-Paper#14. copy and paste into selection. Deselect.
Layers - Load mask: Gemsmasks-107 - Merge group. 
Duplicate the layer. Merge down.

Open: WH-Fireworks#6. c/p in the canvas, place it in the bottom right corner.
Duplicate. Image - Mirror. Image - Flip. Merge down. Apply the mask. 
Rename it: Fireworks.

Open the tube, c/p in the canvas, resize and place it in the left side of the canvas.
Add drop shadow:
V: 2 H: 3
O: 45 B: 6

Add more elements to decorate the tag:
WH-Hat
WH-Heart#2
WH-Ribbon
WH-Star#2
WH-Star#3
WH-Wordart#2

Always: Resize, sharpen and place as desire. 
Add drop shadow:
V: -1 H: 3
O: 50 B: 4

Add copyright and your name. If you want a non animate tag, Merge Visible, copy and paste as new image.
Export as a png or jpg.


To animate:
Activate the layer: fireworks.
Effects - Plugins - Xenofex 2 - Constellation:

Copy Merged.
Open Animation Shop, paste as a new animation. Back to psp, undo the constellation effect and apply again
but change the random seed. copy merged, go to animation shop, paste after current frame, do it one more time.
Now you have 3 frames, play the animation if you like it, save it!!

viernes, 22 de junio de 2012

Proud of my ink


Supplies Needed: 
Psp
Animation Shop
Tube of choice. I am using a tube by Obviously Cloe. Purchase it: here
Forum set template 007 by me in PSP here and PSD here **new link here
Gradient made by me here
AAA filter (scatter) here
Font here

Open the template: 600x200

Duplicate the file and close the original.
Delete the layer: credits

Activate the layer: background. 
Replace with a layer floodfill with the gradient.
Repeats: 0
Angle: 0
Invert: Unchecked
Style: Linear

Adjust - Blur - Gaussian Blur: 
Radius: 5.

Effects -  Plugins - AAA Filters - Scatter:

Effects - Texture Effects - Blinds:

Activate the layer: half stars lines - fill - 

Selections - All - Float -  Defloat.delete the layer.
Activate the gradient layer. Edit - Copy. Add a new layer.
Edit - Paste into selection. Rename it stars fill.

Activate the background layer. 
Effects - Artistic Effects - Halftone.

Activate the layer: half stars lines.
Adjust - Add/Remove Noise - Noise:
Gaussian
60 percent
Monochrome

Add drop shadow:
V: 0 H: 3
O: 45 B: 3

Open the tube, c/p in the canvas, resize if needed. Place it in the left side. 
Add drop shadow:
V: 1 H: 2
O: 50 B: 6
Add copyright and your name. Change the frame if you want.

To animate:

Activate the layer: Stars Fill
Effects - Artistic Effects - Halftone.

Edit - Copy Merge. Open Animation Shop, paste as a new animation.
Back to psp. Undo the halftone effect.
Apply again but change the Size to: 5
Copy merged, paste after currente frame.
Then to: 7, 6, 4.
Now you have 5 frames, change the speed to: 15.
Play it, if you like it save it!
You're done :D