
Supplies Needed:
Psp & Animation shop
Tube of choice. Art by Danny Lee, the tube is available here
Scrap kit Sweet Emo (PTU) by Bibis Collections here
Plugins:
Eye candy 4000
Font here
Open a new image: 650x600
Open: BIBISWEETEMO ELEM (23). C/p in the canvas.
Layers - Load/Save Mask - Load Mask from the disk:

Merge group. Duplicate.
Effects - Plugins - Xenofex 2 - Constellation:

Open: BIBISWEETEMO ELEM (17). C/p in the canvas, resize at 75 percent - Smart Size.
Place it in the top center, below the mask.
Open: BIBISWEETEMO ELEM (47). C/p in the canvas, resize at 55 percent - Smart Size.
Place it in the top center.
Activate the top layer.
Open: Open: BIBISWEETEMO ELEM (43). C/p in the canvas, resize at 60 percent - Smart Size.
Place it in the bottom right.
Open: Open: BIBISWEETEMO ELEM (6). C/p in the canvas, resize at 45 percent - Smart Size.
Place it at the top of the grass.
Open: Open: BIBISWEETEMO ELEM (33). C/p in the canvas, resize at 80 percent - Smart Size.
Image - Mirror. Place it in the top center. Duplicate and change the opacity to: 60.
Open: Open: BIBISWEETEMO ELEM (7). C/p in the canvas, resize at 50 percent - Smart Size.
Place it at the bottom left.
Open: Open: BIBISWEETEMO ELEM (67). C/p in the canvas, place it at the top left.
Open: Open: BIBISWEETEMO ELEM (79). C/p in the canvas, resize at 50 percent - Smart Size.
Place it at the left side, copy and paste as a new selection twice or more around the canvas.
Open: Open: BIBISWEETEMO ELEM (31). C/p in the canvas, resize at 40 percent - Smart Size.
Place it at the top center, below the two hearts.
Open: Open: BIBISWEETEMO ELEM (41). C/p in the canvas, resize at 55 percent - Smart Size.
Place it at the bottom right.
Open: BIBISWEETEMO ELEM (64). C/p in the canvas, resize at 45 percent - Smart Size.
Place it at the bottom of the tree.
Open the bunny from the tube or BIBISWEETEMO ELEM (81). C/p in the canvas, resize at 85 percent - Smart Size.
Place it at the bottom right, next to the tree.
Open: BIBISWEETEMO ELEM (63). C/p in the canvas, resize at 50 percent - Smart Size.
Place it at the bottom right, behind the bunny.
Open the tube c/p in the canvas and place it in the center.
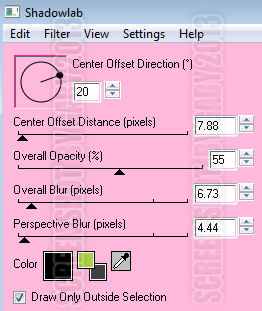
Effects - Plugins - Eye Candy 4000 - Shadowlab:

Open: BIBISWEETEMO ELEM (18). C/p in the canvas, resize at 40 percent - Smart Size.
Place it at the bottom center, next to the tube.
Open: BIBISWEETEMO ELEM (72). C/p in the canvas, resize at 50 percent - Smart Size.
Place it at the bottom center, next to the small crystal ball.
Open: BIBISWEETEMO ELEM (59). C/p in the canvas, resize at 50 percent - Smart Size.
Place it at the bottom center.
Open: BIBISWEETEMO ELEM (14). C/p in the canvas, resize at 40 percent - Smart Size.
Place it at the bottom left.
Open: BIBISWEETEMO ELEM (56). C/p in the canvas, resize at 40 percent - Smart Size.
Place it at the left side.
Open: BIBISWEETEMO ELEM (37). C/p in the canvas, resize at 50 percent - Smart Size.
Place it at the left side, above the tree.
Sharpen the elements and apply shadow.
Effects - Plugins - Eye Candy 4000 - Shadowlab:

Add the name and copyright info.
To animate:
Close all the layers below the rainbow, with this layers included.
Merge visible all the open layers. Rename it: 1. Close it.
Open the rest of the layers. Copy merged.
Open animation shop and paste as a new animation. Duplicate until you have 18 frames.
Open: SimoneAni293.mng
Activate the first frame, select all.
Animation - Cull Animation: Remove 1 frame every 3 frames.
Drag into the tag and place it in the center.
Back to psp. Open the layer 1 and Copy. Paste as a new animation in animation shop.
Duplicate until you have 18 frames.
Activate the first frame, select all. Drag into the tag and place it where it belongs.
**Adding a background to the transparent animation.
Animation - Animation Propieties
Change the black color for the color of your choice, mine is white:
Apply and the color will be applied in all the frames selected.
Change the speed to: 12, play the animation and save if you like! :)