Supplies Needed:
Psp
Tube of choice. Art by Gargirl, available here
Scrap kit Hallows Eve (PTU) by Sky Scraps here
Plugins:
Eye candy 4000
Font here
Open a new image: 600x650
Open: SkyScraps-HE-E74. C/p in the canvas, resize at 70 percent - smart size.
place it in the center.
Open: Open: SkyScraps-HE-E75. C/p in the canvas, resize at 60 percent - smart size.
place it above the first one.
Open: SkyScraps-HE-E12. C/p in the canvas, move it to the left side and remove the
parts you don't want.
Open: SkyScraps-HE-E87. C/p in the canvas, resize at 55 percent - smart size.
place it in the right side, send the layer to the bottom. Duplicate, Image - Mirror.
Open: SkyScraps-HE-E37. C/p in the canvas, resize at 60 percent - smart size.
Place it in the center, between the organge buildings.
Open: SkyScraps-HE-E63. C/p in the canvas, resize at 70 percent - smart size.
Place it at the top of the orange buildings.
Open: SkyScraps-HE-E85. C/p in the canvas.
Activate the pick tool:
and strech the element.
Change it:
and strech again:
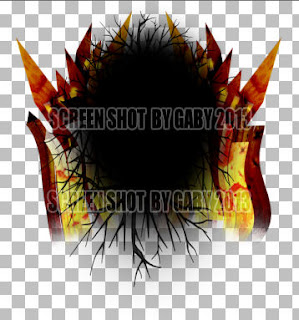
result:
Send the layer to the bottom. Duplicate. Image - Flip.
Place it above and next to the first one. Merge down
With the selection tool:
Make a rectangle around the element:
Selections - Invert. Edit - Clear, twice. Deselect.
Open: SkyScraps-HE-E30. C/p in the canvas, resize at 50 percent - smart size.
place it in the middle of the canvas to the left, duplicate move it to the right.
With the eraser tool:
Eraser a few parts:
Open: SkyScraps-HE-E38. C/p in the canvas, resize at 40 percent - smart size.
place it in at the bottom of the flames in the left, duplicate. Image - Mirror. Arrange it.
Open: SkyScraps-HE-E15. C/p in the canvas, resize at 30 percent - smart size.
place it in at the bottom left, above the grey leaves. Duplicate. Image - Mirror.
Sharpen the elements and apply shadow.
Effects - Plugins - Eye Candy 4000 - Shadowlab:
Open the tube, c/p in the canvas, place it in the center.
Effects - Plugins - Eye Candy 4000 - Shadowlab:
Add your name and copyright info.
To animate:
Activate the layer with the fire flames. Duplicate twice, in the layer palette change the
blend mode of the first copy to: Overlay, activate the last copy and change the
blend mode to: Hard Light.
Effects - Plugins - Eye candy 4000 - Jiggle:
Copy merged, Open animation shop: paste as a new animation.
Back to psp, undo the effect. Apply again but change the random seed.
Copy merged, in animation shop, paste after current frame.
Back to psp, undo the effect.
**Optional: activate the layer in overlay mode, change the opacity to: 50.
Apply again but change the random seed. Copy merged, in animation shop, paste after current frame.
Back to psp, undo the effect and apply again but change the random seed.
Copy merged, in animation shop, paste after current frame.
Back to psp, undo the effect.
**Optional: activate the layer in overlay mode, change the opacity to: 25.
Apply again but change the random seed. Copy merged, in animation shop, paste after current frame.
Back to psp, undo the effect and apply again but change the random seed.
Copy merged, in animation shop, paste after current frame.
**Adding a background to the transparent animation.
Animation - Animation Propieties
Change the black color for the color of your choice, mine is white:
Apply and the color will be applied in all the frames selected.
Change the speed to: 13, play the animation and save if you like! :)


No hay comentarios:
Publicar un comentario